Up-Cycle Large Display Units
Learn step-by-step how I converted a standard cabinet into a charming painted chest of drawers with my DIY guide


I purchased two ex-shop display cabinets with shelves with the view of re-purposing them into a more useful modern piece of furniture.
Firstly I gave the units a really good clean using sugar soap and water this helps remove any grease and contaminates from the surface which may affect the refinishing process further down the line.
I removed the doors and shelves cutting the doors in two to create 4 draw fronts.


Building the Draws
I built 4 draws for each unit using 18mm plywood with 6mm base boards adding a central base stiffener to allow the draws to take a heavy weight.

Iron on draw Edging
The top edges of the draws a applied a iron on birch wood edging to hide the plywood mitred on the corners to give a quality feel.
Kreg Wooden Plugs
The inside rear face of the draws I used the Kreg wooden plugs glued in to hide the screws, once dry these where planed off and sanded giving a really good finish. Using them makes it easy to stain or paint the wood to I high standard
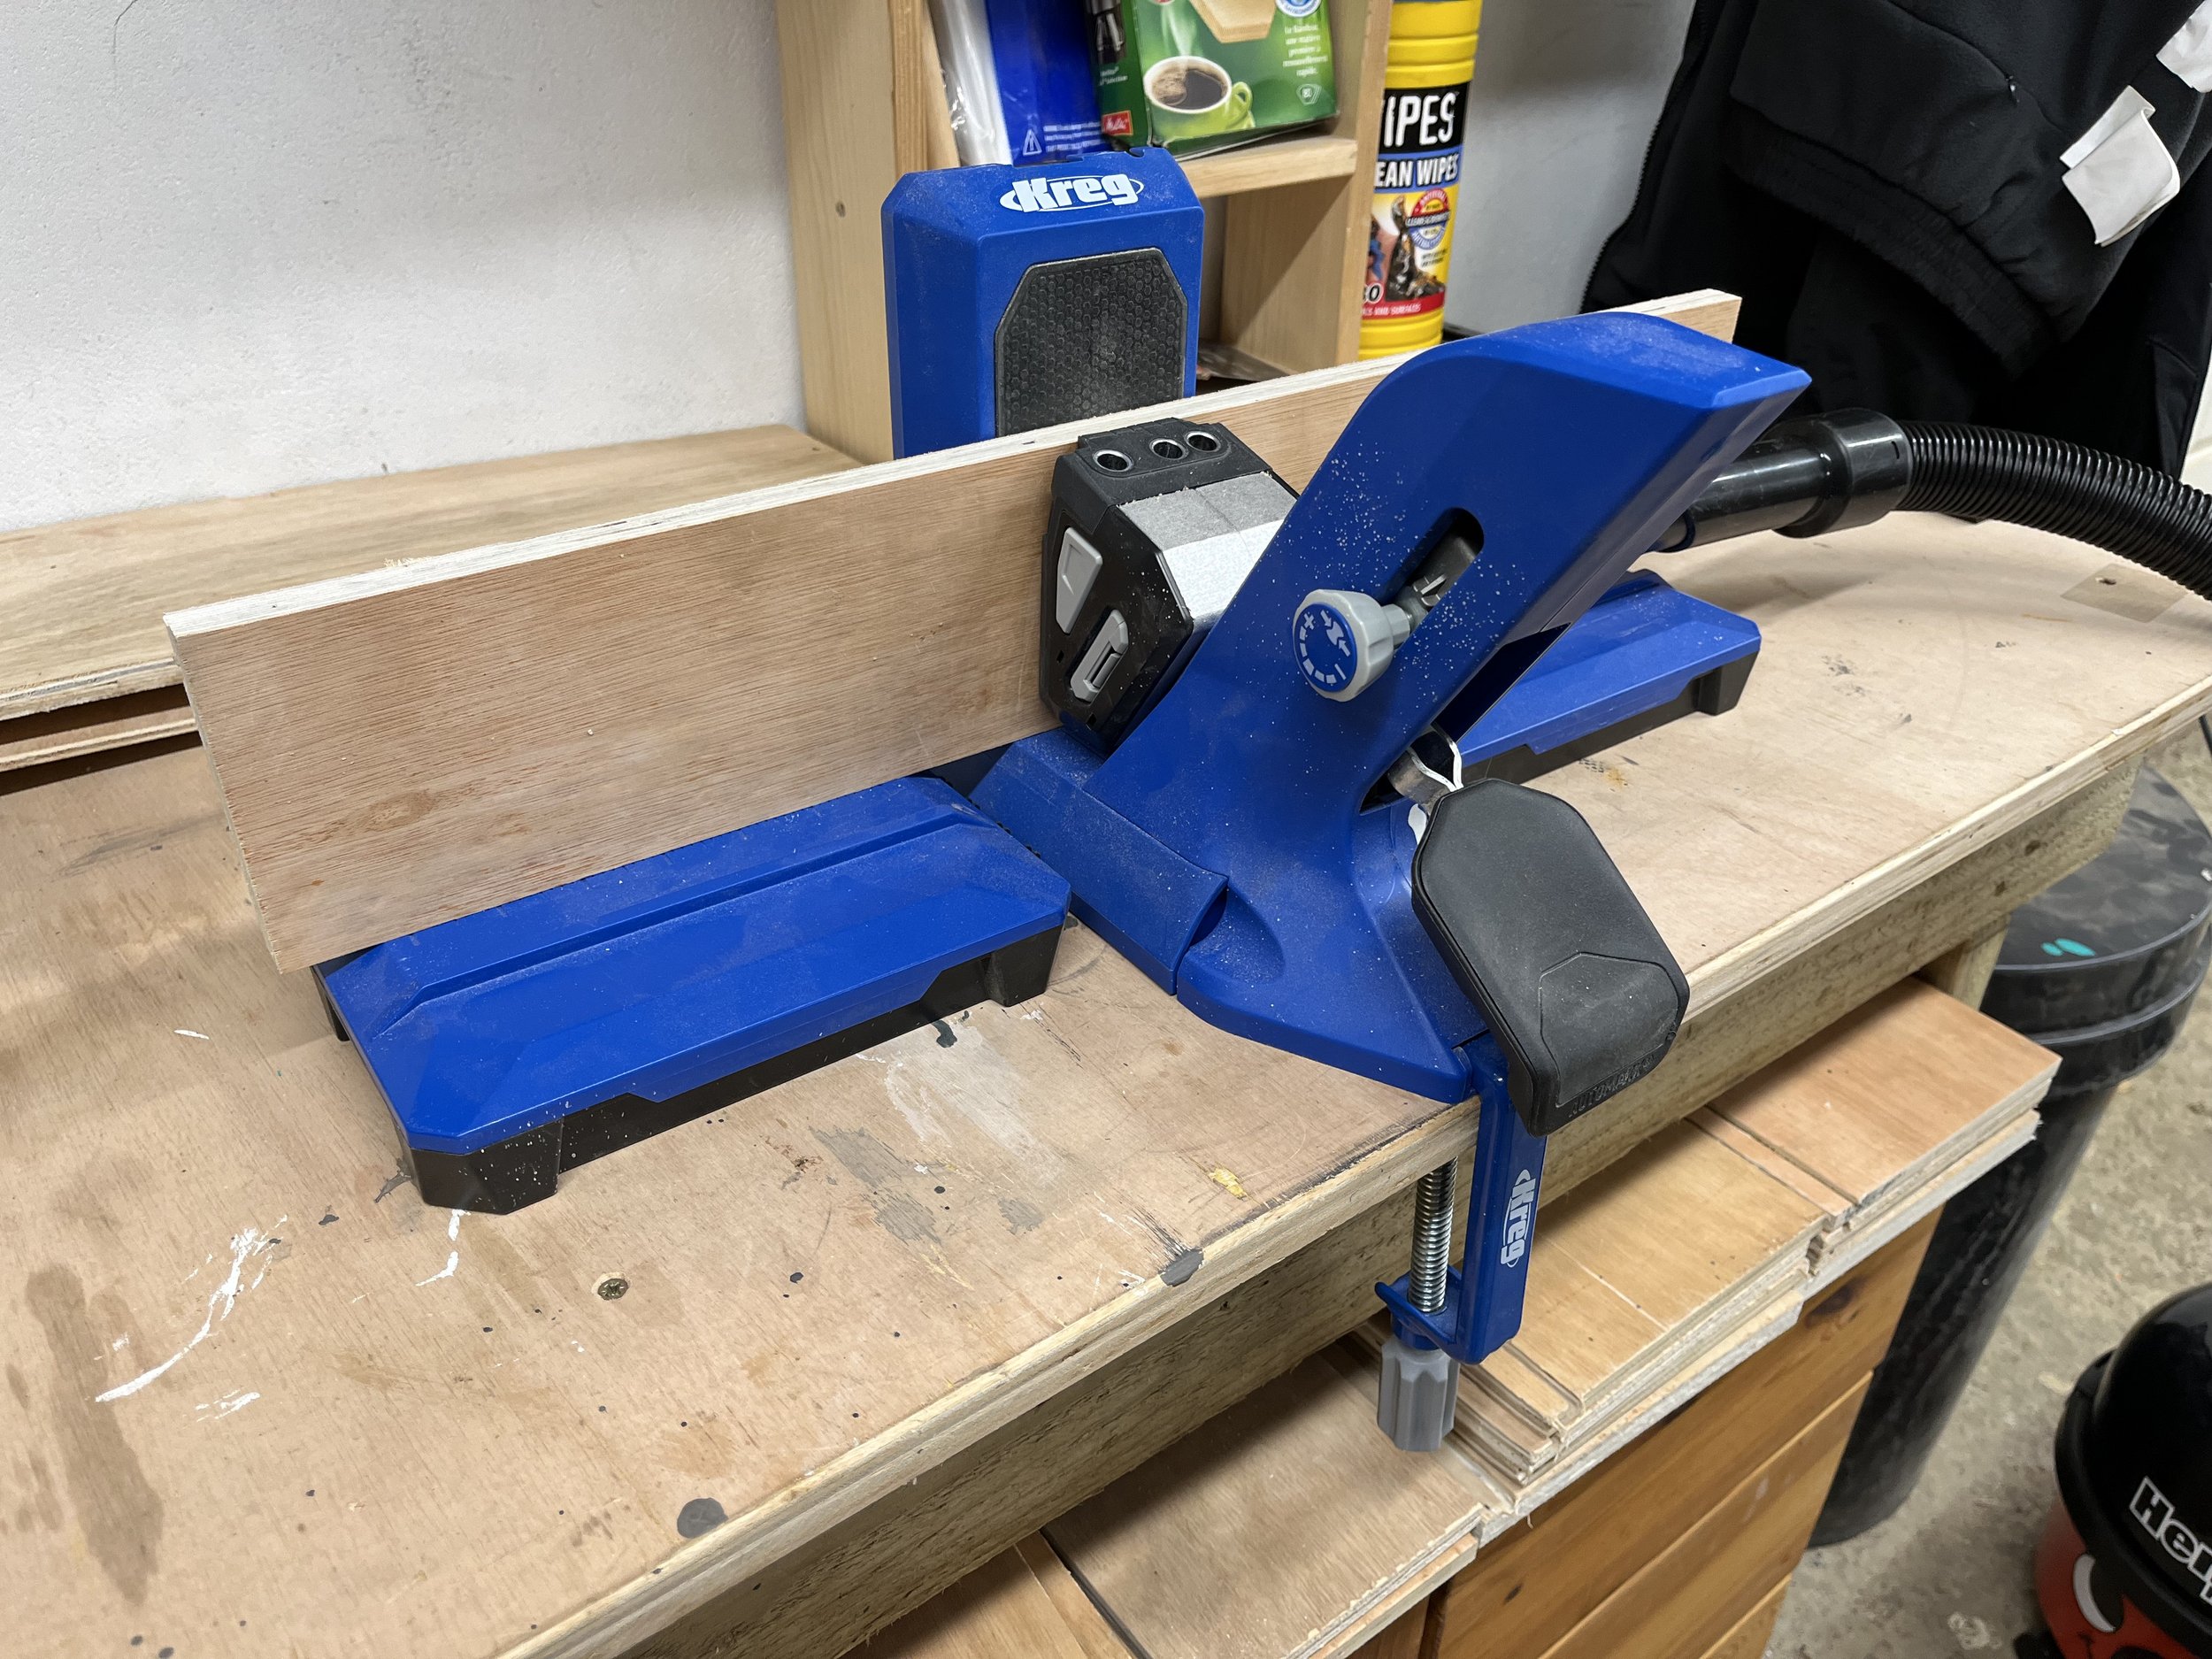
Kreg Jig Pocket Hole 720 PRO
I use the Kreg Jig Pocket Hole 720 PRO as I find the ease of use and vacuum facility helps make a perfect clean hole. Very easy to use system, highly recommend it.
Using Kreg pocket holes makes a very strong joint. I personally clamp the joint and then screw it together which holds it in place for perfect alignment. I did not glue any of the joints on this project as using this pocket hole system makes for very robust joint.
Have a look at YouTube as there are many videos on how to use the Kreg pocket Hole system.

Kreg Drawer Front Alignment Jig
Draw front alignment was made easier by using a Kreg drawer front alignment jig
Holds the panel firmly in place whilst screw them on.
Fitted the draws to the units with Klug soft close runners, which gives them a soft smooth feel when closing.
Watch them in action
Video shows Blum soft close drawer runners in action
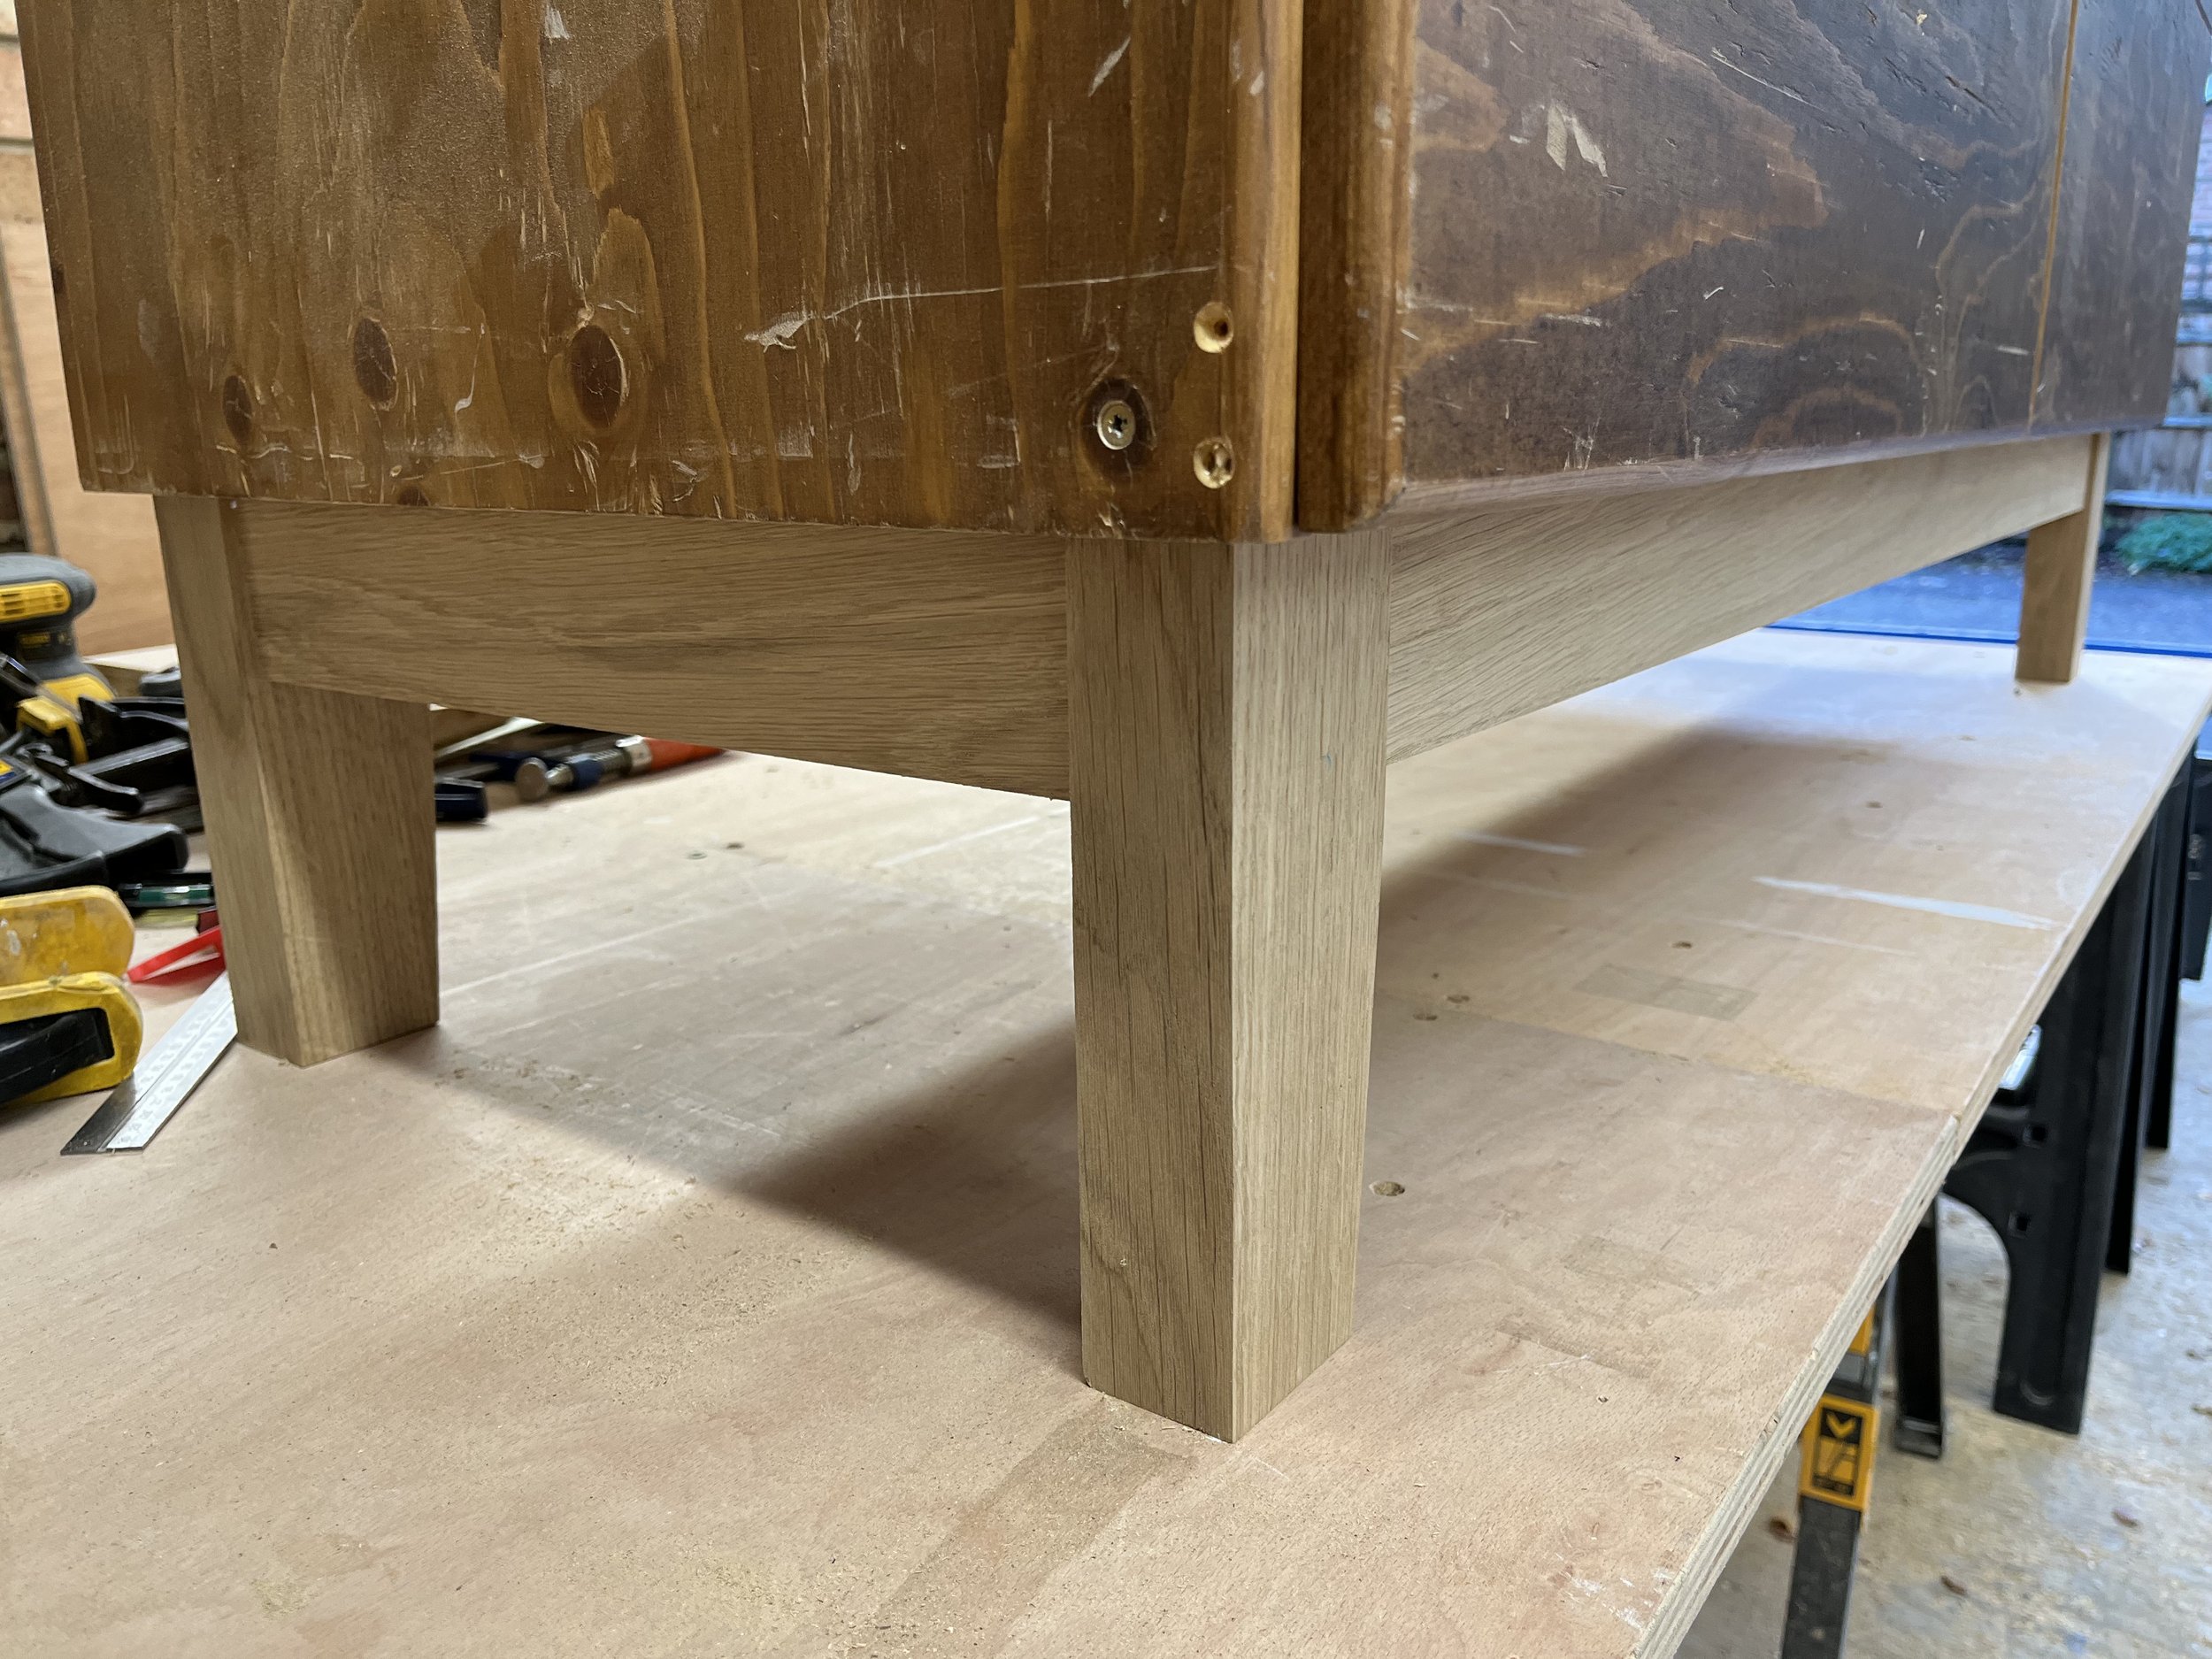
Next step was to make a base leg plinth I used White American Oak. I cut down the planed Oak and fixed all the components together using the Kreg Pocket Hole system again no glue used.
The lower legs and plinth I finished in Rubio Monocoat Oil Plus 2C A another very easy product which has given a really soft smooth sheen to the oak


Finally came the painting
After a good sanding using a DeWalt orbital sander connected to a Festool vacumn unit starting with 180grit working up to 400grit the units got spray with two coats of primer followed by two coats of Dulux Trade Quick dry satin Wood - Noble Grey
The units then got carefully masked with J Tape fine line tape. This gives a extremely shape straight line but does not cause a ridged step to the edge.
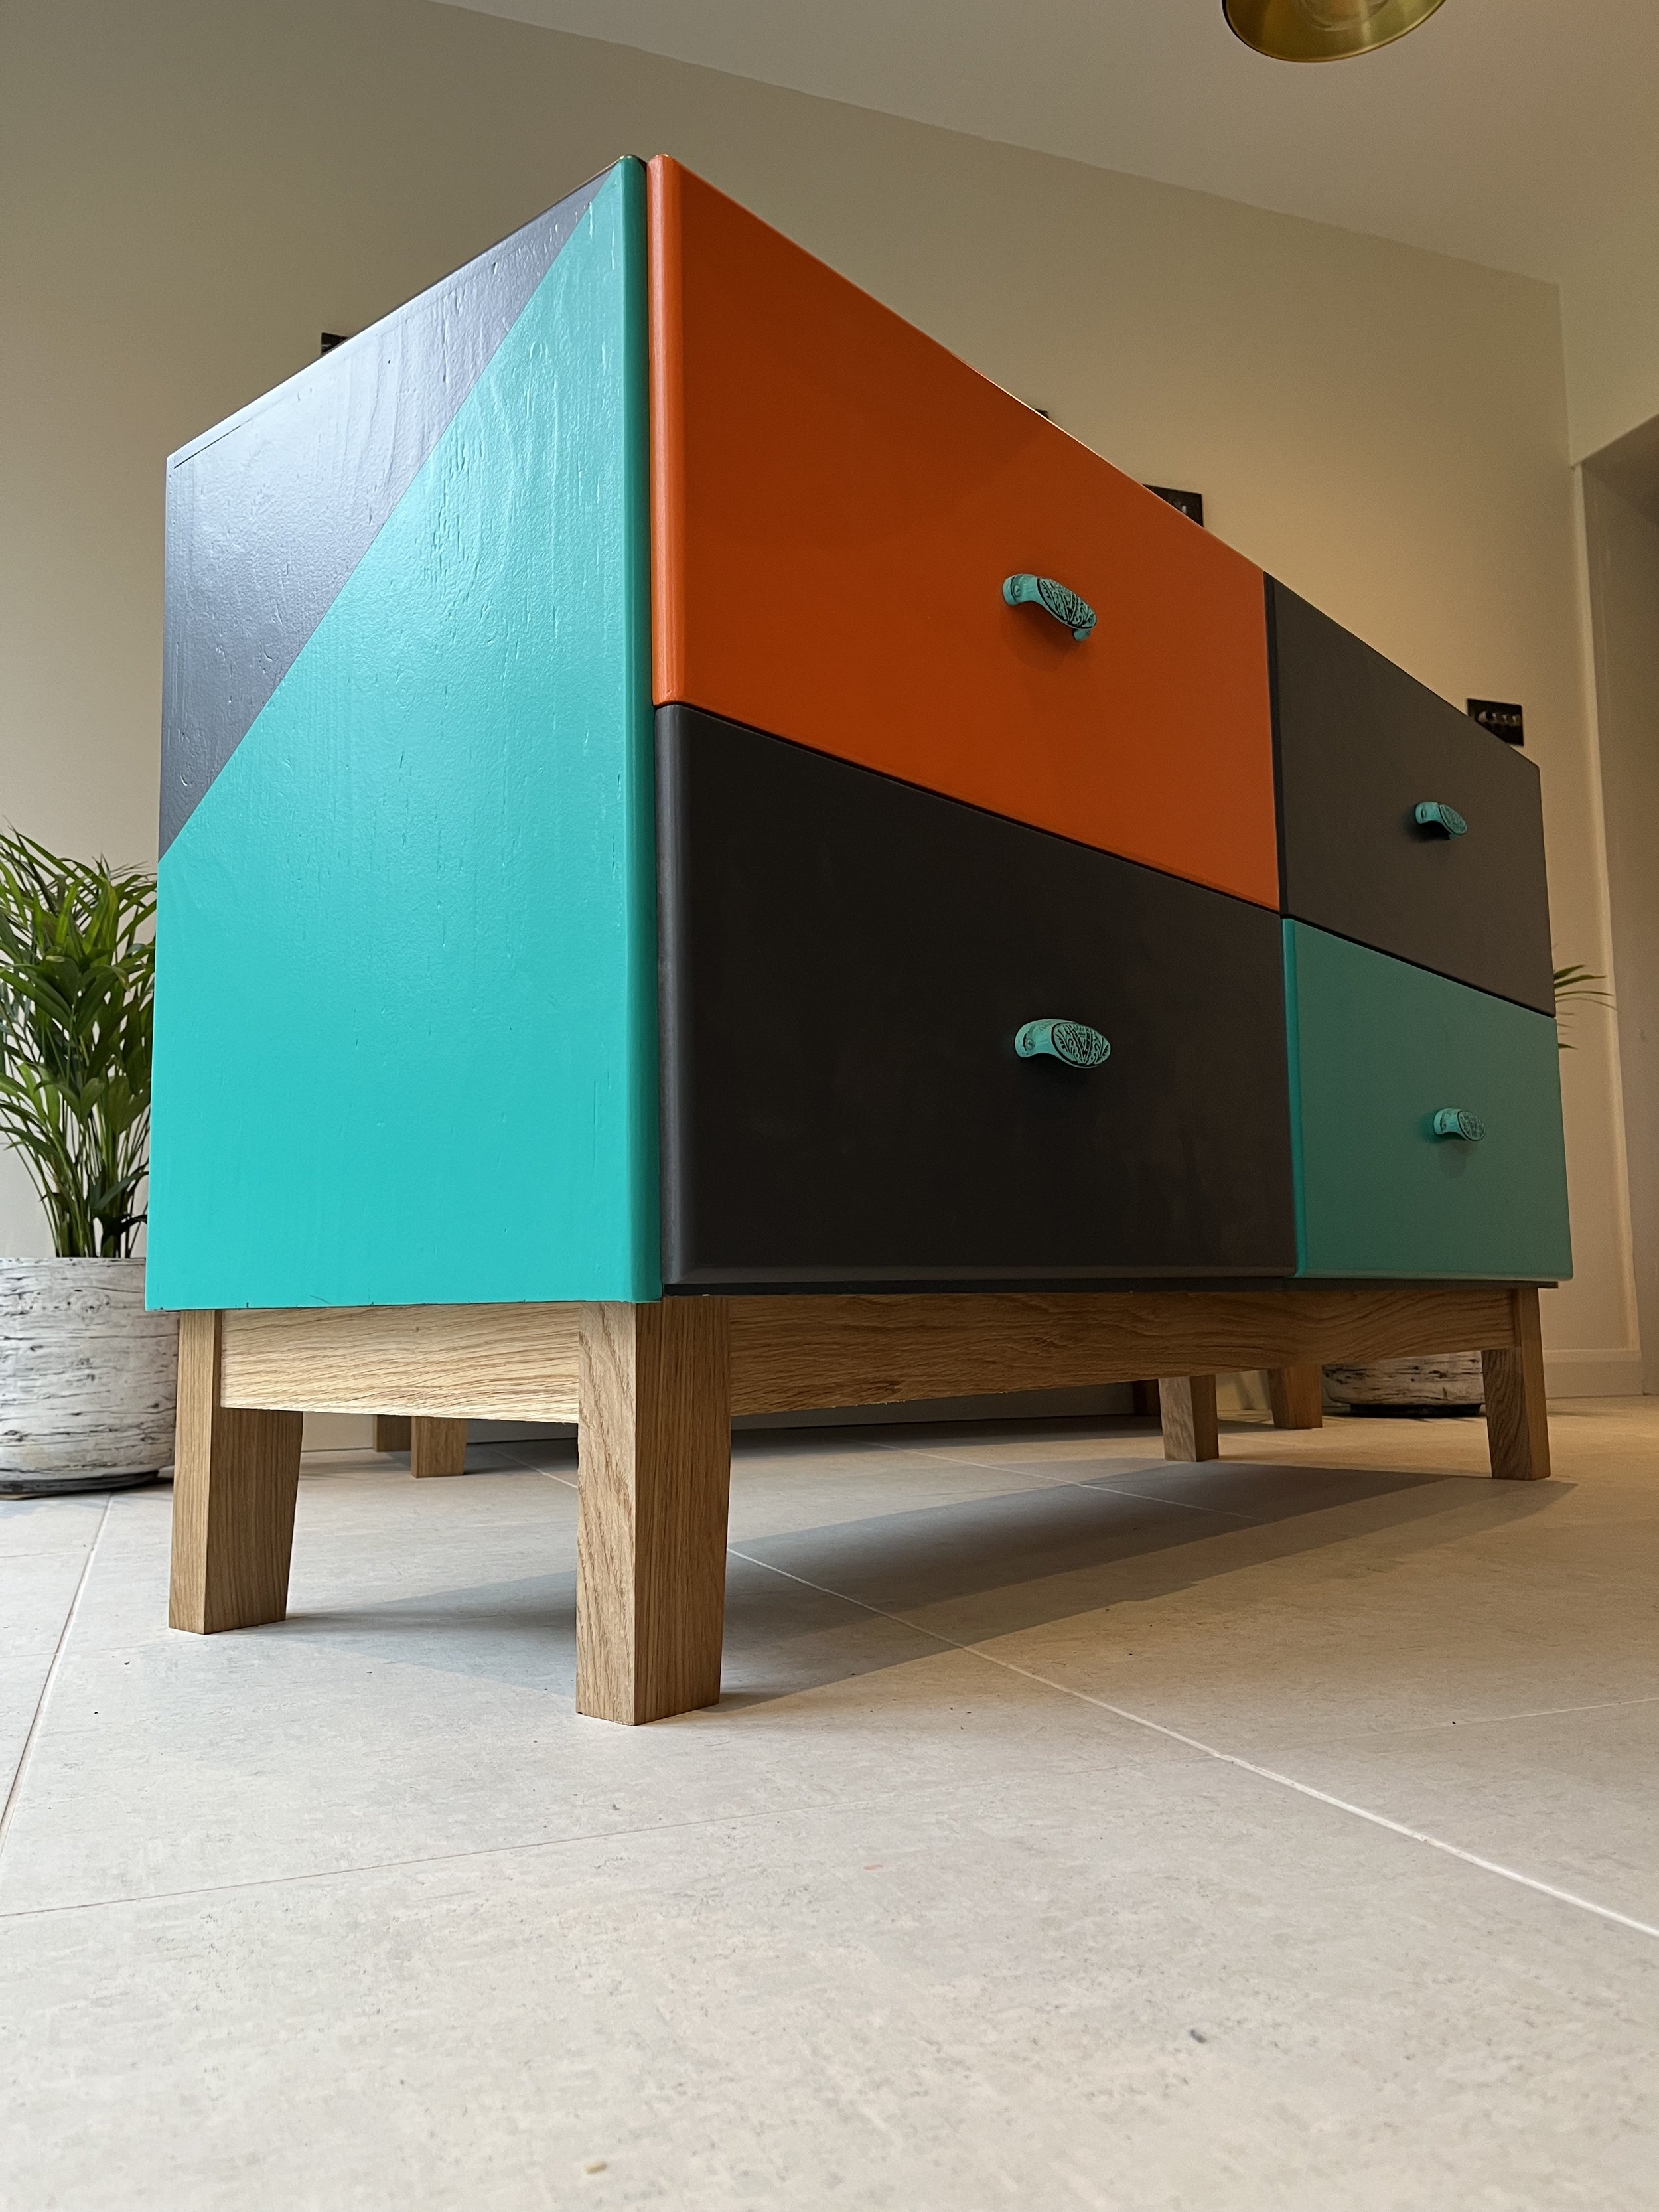
Dulux Finest Turquoise and Moroccan Flame featured the two other colours.
The rear face has also been painted as well, which if required the units can be used free standing as room dividers, not just pushed up against the wall to hide the ugly back.
The interior of the draws have had a couple of coats of polyurethane sealant and colourful patterned liners on the bottom. Both these steps make it easy to clean the inside of the draws with a soft damp cloth.
Priming both cabinets ready for topcoat.
So there it is, possibly a bit ambitious as a first project, but found it great learning curve making and fitting the drawers and designing and making the base plinth
Roll on the next one — already under way large ex-shop display 2.0 Mt long table, watch this space

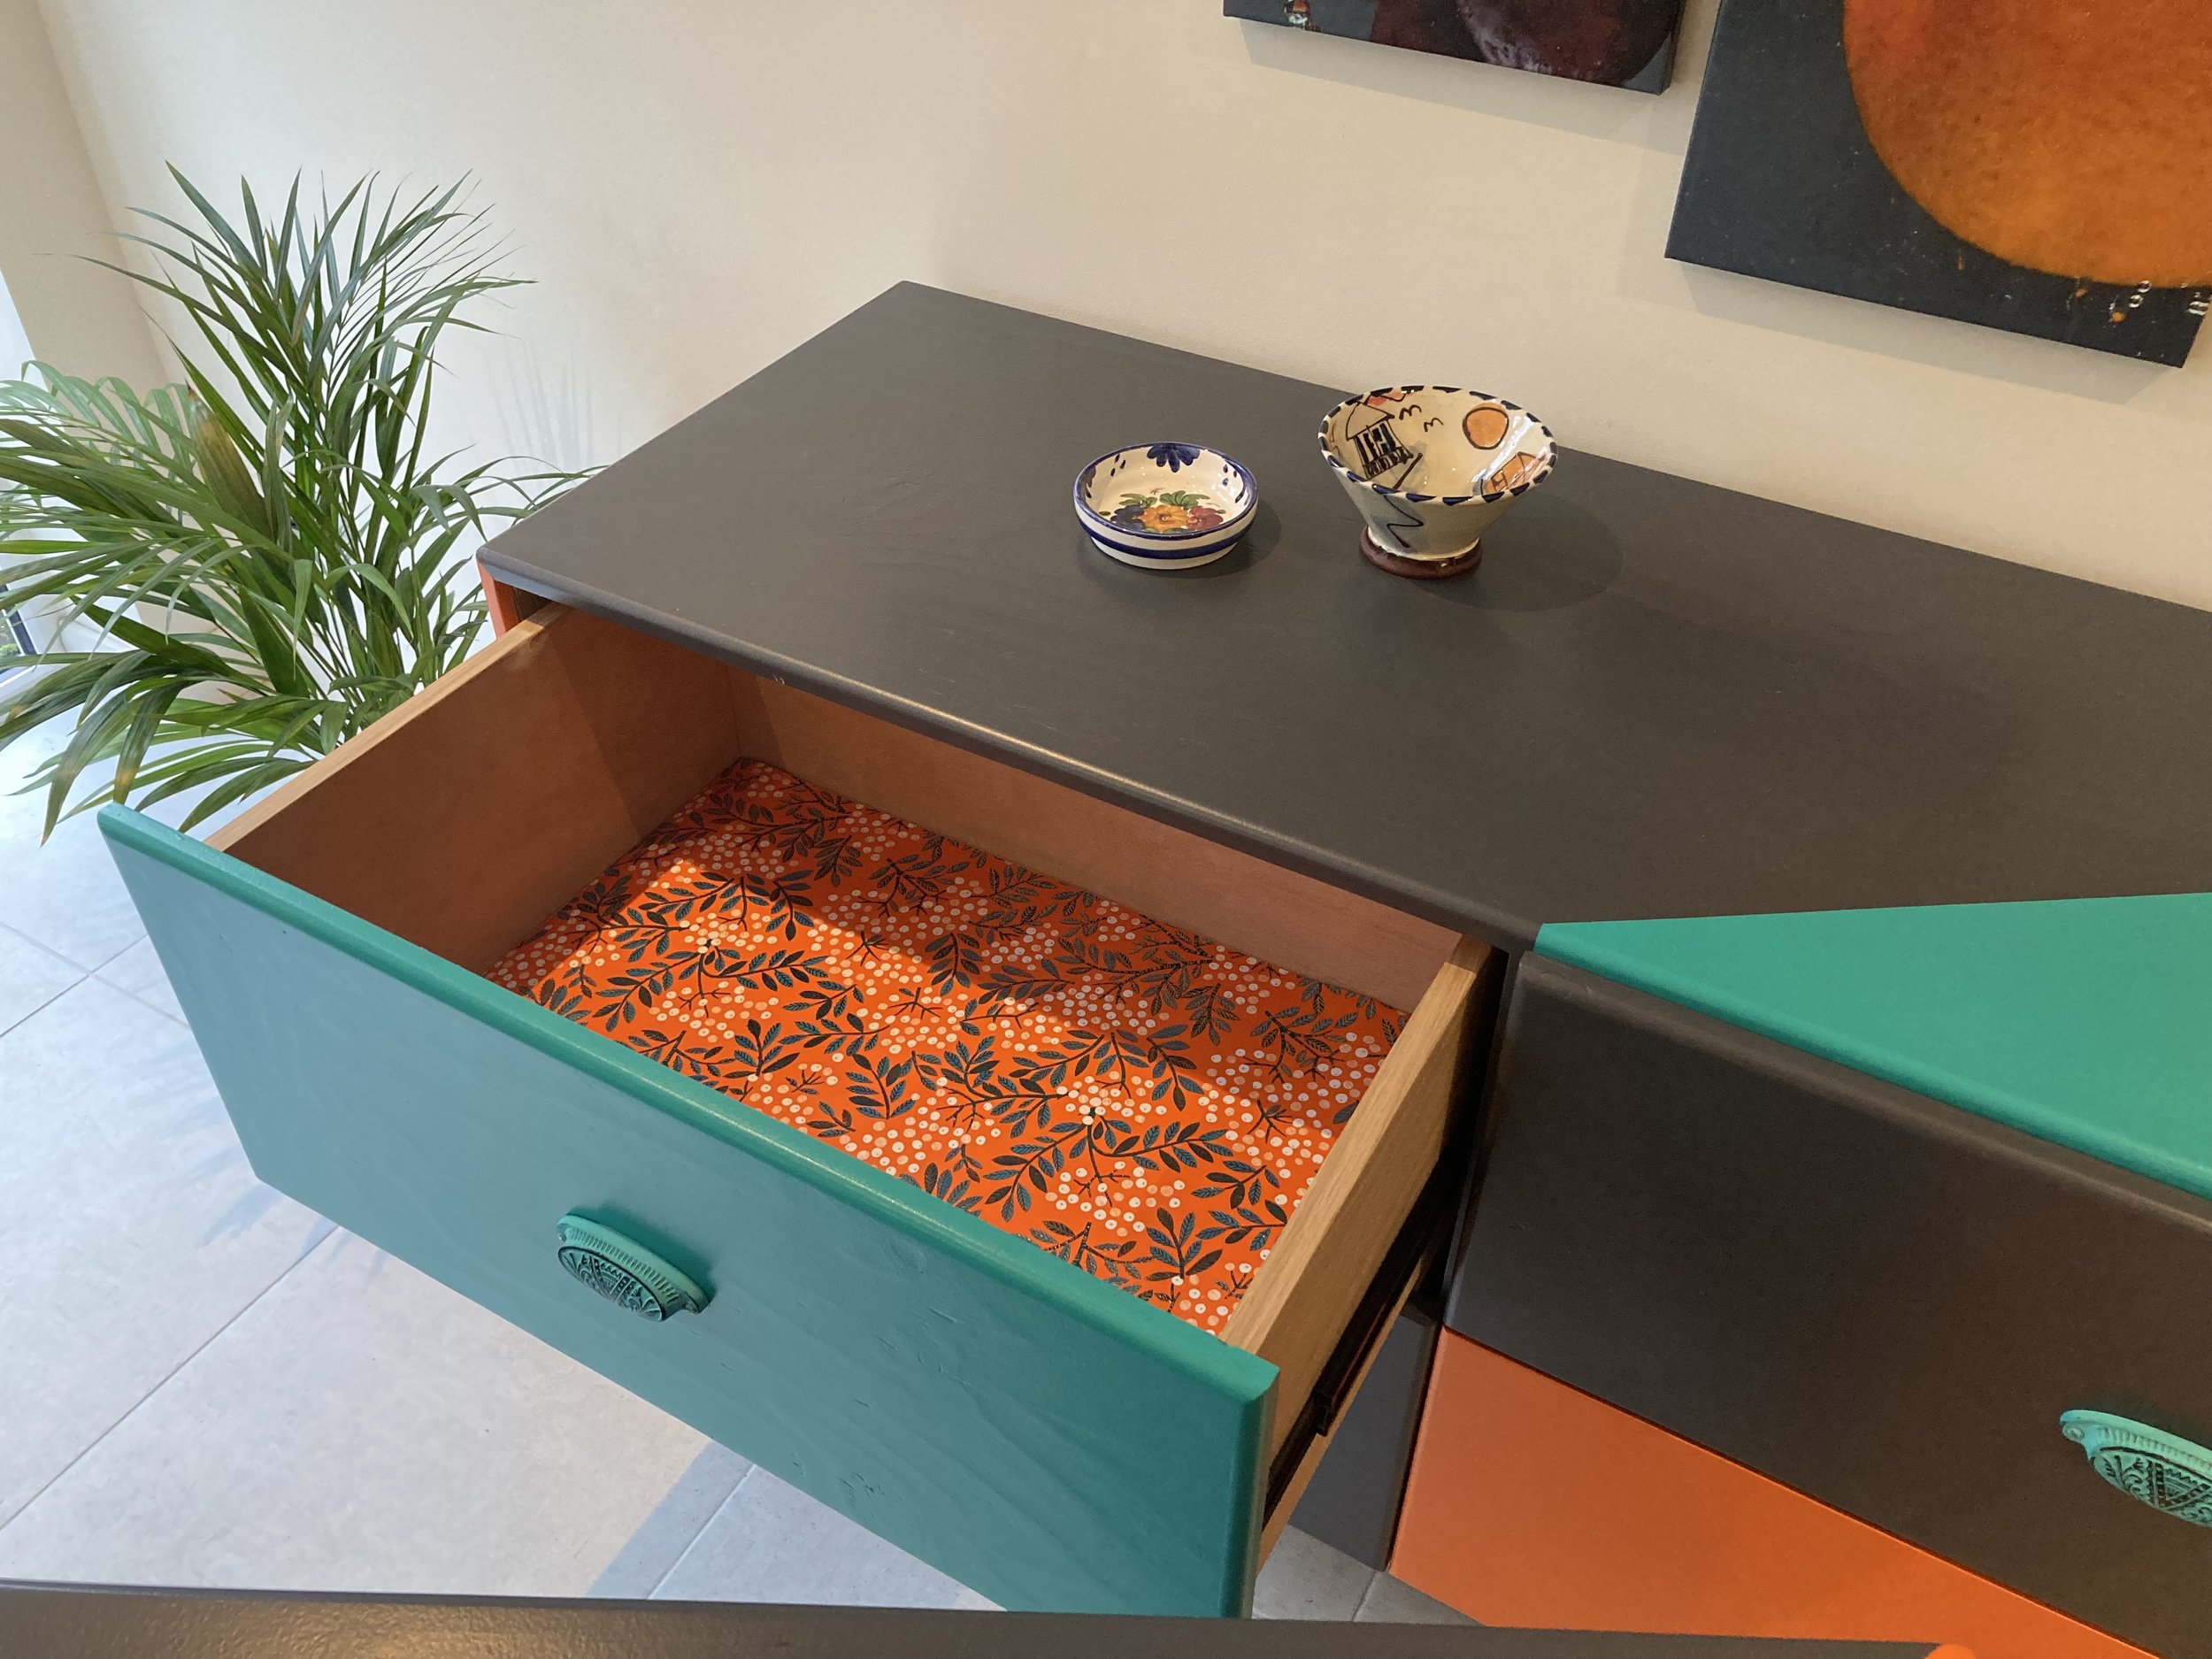


Introducing our exquisite Chest of Drawers, a perfect blend of functionality and style. We have two units available, each measuring 140cm wide, 52cm deep, and 81cm high. These stunning pieces feature four deep drawers, each 610mm wide, 415mm long, and 175mm deep, fitted with Klug soft-close heavy-duty runners for a smooth and silent closing experience.
Crafted with precision, the Chest of Drawers boasts a Solid White American Oak base plinth and legs, ensuring durability and a touch of timeless elegance. The Noble Grey finish, complemented by the Moroccan Flame and Finest Turquoise paint scheme, adds a touch of sophistication to any space.
What sets these units apart is their versatility – with painted backs, they can stand freely in a room, making them an excellent choice for those who appreciate flexibility in their interior design. No need to push them against a wall; let the beauty of the Chest of Drawers shine from any angle.
Organise your belongings with style and ease, thanks to the thoughtfully designed layout of the drawers. The Klug soft-close runners enhance the overall user experience, providing a touch of luxury to your daily routine.
Don't miss the opportunity to bring home these exceptional Chests of Drawers. Elevate your living space with a perfect combination of functionality, quality craftsmanship, and aesthetic appeal. Order now and experience the seamless integration of practicality and artistry in your home.